Pages

Showing posts with label Tutorials. Show all posts

Friday, August 28, 2015

A Very Suessical Baby Shower

This past weekend, I had the opportunity to throw my SIL a Dr. Suess Baby Shower. It was a super fun baby shower because the baby had already arrived! I think those are the most fun! 😉

Decorations:

I had made the expectant Mom a few Dr. Suess items well before the arrival of the baby (a car seat over, changing pad, and pillow). I had a few scraps left over and used them to make a banner with his name. I got my Dr. Suess Fabric here.  I used my handy dandy silhouette and some heat transfer vinyl for the name. I love using double folded bias tape for banners because it puts them together super fast.  

I love to use balloons for a party because the kids love them so much. So I had balloons for them and a few little Suessy type decorations for them to put on the walls to "help" me. 

I also made a diaper cake. It looked much better before the 1.5 hour flight to get here. With everything else I had to do, I must say I just kind of let it go, but the monkey was suppose to hide the ribbon seams. I used the typical method of rolling diapers. I found Dr. Suess ribbon at JoAnns Fabrics. 


Amazon had this awesome teacher pack of Dr. Suess stuff.  It had tons of cutouts which I used to make the wreath (see below) and I used for the mini diaper cakes and for this book banner. 


I got this from Amazon and set the books around for decorations. They also doubled as backs for writing during the games. 


This bulletin trim was at Target and the straws I picked up at Amazon and the turtle came in the aforementioned teacher pack from Amazon. 


I used this method for the wreath. But I made it rainbow, obviously, and color coded the cutouts. I used regular vinyl for Welcome.


Food:


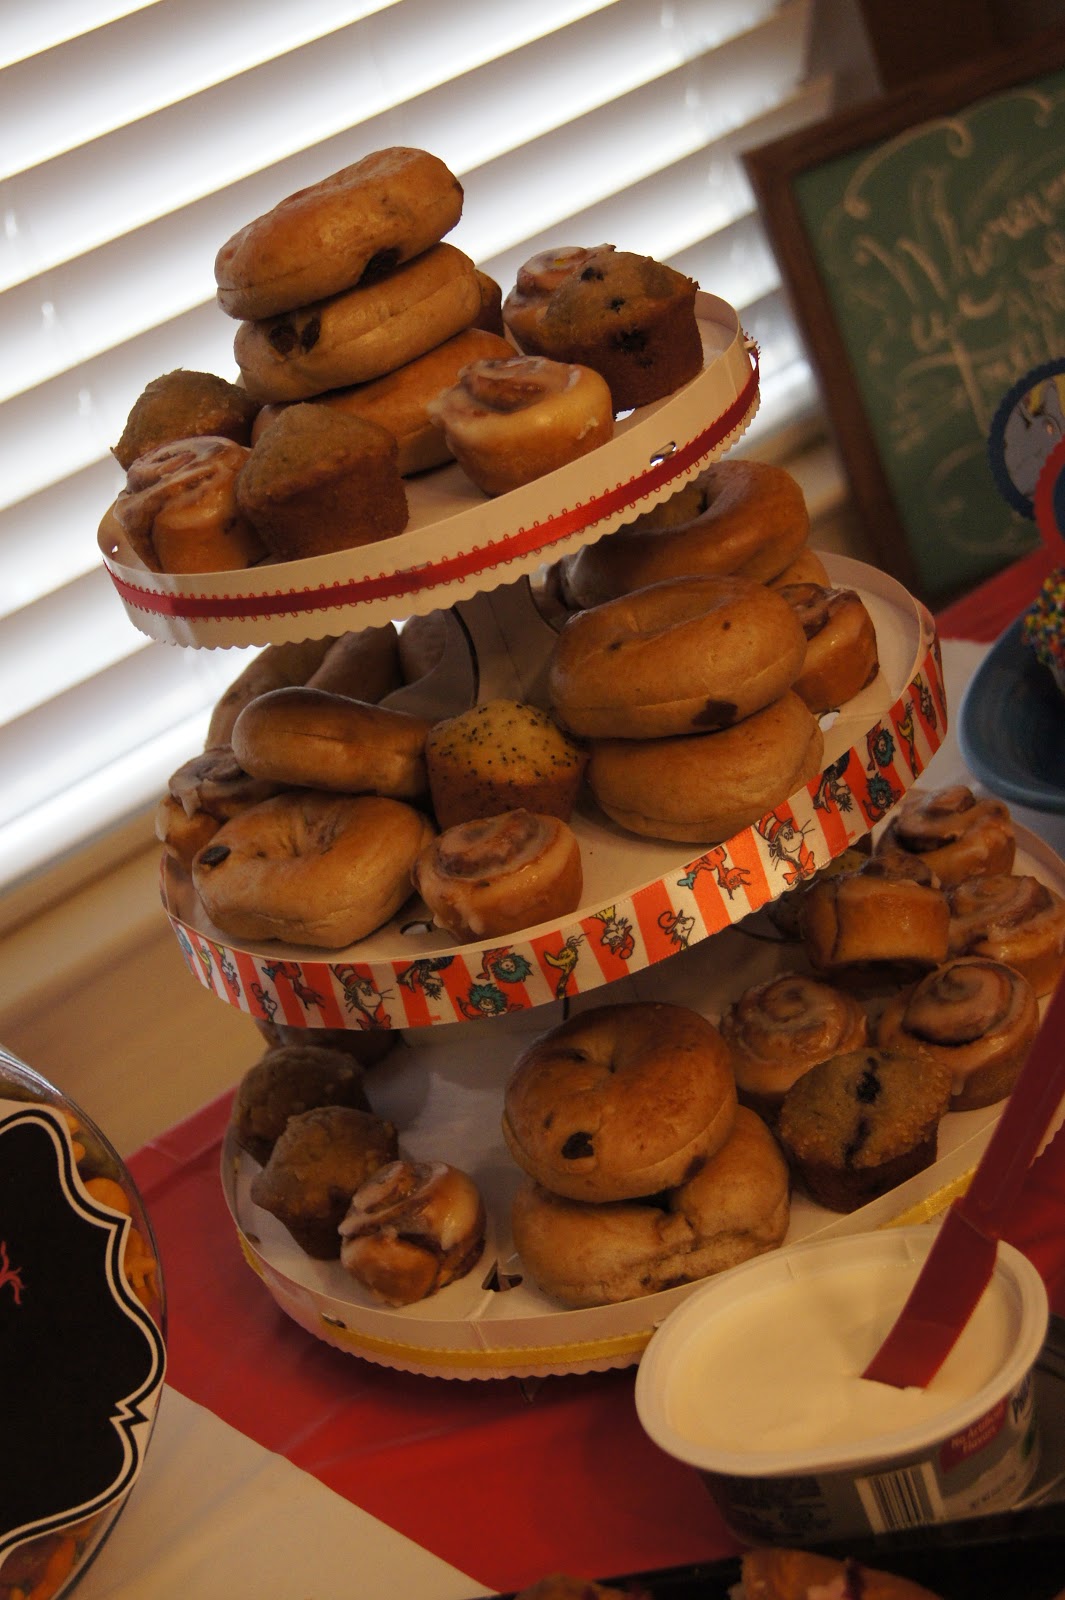
The shower started at 10:30 so I thought it was a little early for regular munchies. Instead, I went with a breakfast theme. I had a fruit salad, powdered donuts and mini blueberry muffins, goldfish, cinnamon raisin bagels, assortments of mini muffins, croissants with ham and cheese (kroger put lettuce on them and it made it too lunchy and I was kind of irritated), bacon wrapped pretzels, cupcakes (it's still a PARTY!), and a parfait bar. 


We had regular and greek yogurt, two kinds of jams, fruit, granola, almonds, coconut, m&ms, mini trix, etc.


 I sent a picture ahead of time to a relative and she went to Kroger and they made me these cupcakes. I made the toppers with my silhouette cameo. 


I had to get a goldfish bowl for the goldfish. It was just too cute of an idea. 


Get the Bacon Wrapped Pretzel Recipe Here. I only added one T of chili powder and 1/4 of cayenne because I knew my crowd and they were not going to like HOT. The first batch was devoured so I offered to make more. There was some protest and some "oh you don't need to do that" and then the second batch was also devoured. I think they were better cooked for 17 minutes. 


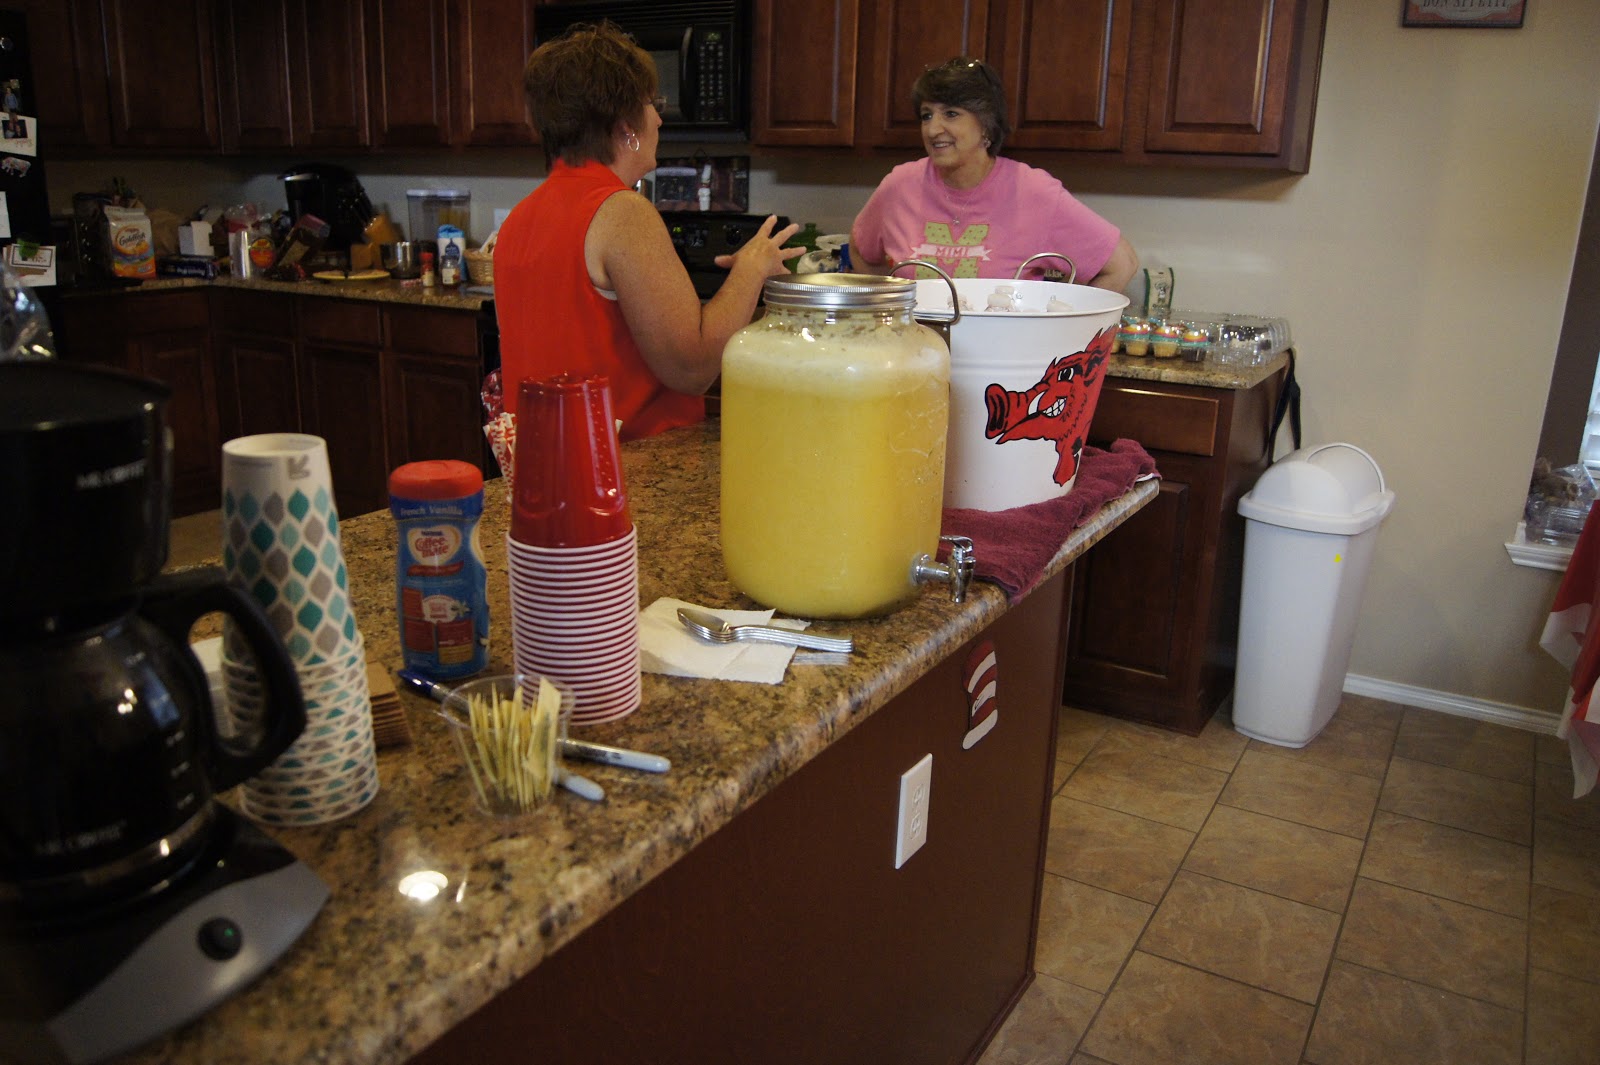
For drinks, we had coffee and this punch and water bottles that I wrapped with red and white polka dot duct tape. Yes, the punch was amazing. I did not slushy it because I didn't have time but still very good. 


Games and Memories:

This "I hope" "game" has been floating around the showers I've frequented lately and I think it's a marvelously good idea. Get your Dr. Suess themed "I hope" game here. Each guests fills out their hopes for the baby's future and signs their name. Instant guest list done and a keepsake for the baby. It also puts away the pressure that games sometimes give to guests. 


I had also planned this game but we ended up having a few too many people to play it. Everyone was more interested in chatting and that's fine! 


At the entry, we set up this table, I made the little lorax guy there to hold my sharpies and pencils. I found Dr. Suess stickers and some corresponding scrapbook paper. Set our scissors, brushes,  and mod podge too and let guest decorate their own blocks for the baby. 


I love having favors and this was something I could make easily make ahead of time, green eggs and ham! I found tiny bags at Joann's Fabrics that only held about two which was perfect. All you need are pretzels, white candy melts, and green candy. I found everything but the pretzels at Joann's Fabrics. Put a white candy melt on top of each pretzel and bake at 350 degrees for 5 minutes. Pull them out and pop on a candy and set in fridge to cool. I was worried the candy would pop off but they didn't and they survived a flight in carry-on luggage. 


A fun time was had by all and the new arrival got lots of new fun baby stuff, which is why we throw baby showers, right? 

Monday, December 29, 2014

Snow White Birthday Party

Yea for turning 3!  I'm so proud of my soon to be 3 year old! Potty trained and polite, loves accessories including shoes, purses, and jewelry, has started trying to write her name, and can sing with the best of them. She is not my dancer...in fact she refuses to dance, but she will sing your ear off. She will plan your outfit for you, and tell you what to do all day long, for that matter. She is very opinionated but takes a long time to make a decision. That's why, I was shocked one day when she announced that she wanted a Snow White birthday party. 

Now, she has seen Snow White. She went through a Snow White everyday phase for a bit, but it hasn't been lately. She did not back down from the decision and even told Snow White herself at Disney World that she was having a Snow White birthday to which Snow White replied, "Your having a birthday about me!?" NOTE: I also must add here that I am super excited to NOT be throwing a Frozen birthday party.

So I put it off as long as I could, but I pulled off a Snow White Birthday Party! 

Friday, May 30, 2014

Terry Lounge Chair Cover Tutorial

In honor of SUMMER!!!! I'm re-posting my Beach Towel Chair Cover Tutorial that I originally posted on my MomMomWheel blog that I never kept up with. Enjoy!


My sister was up visiting and with her upcoming wedding, she was browsing the web searching for ideas for Bridesmaids gifts. I suggested she check out the Swoozies website. They have very cute, personalized gifts. She stumbled upon the Terry Lounge Chair Cover, and then admitted how much she actually wanted one. I took one look and thought how easy it would be to make these. They sell them all over the web from $30 to $50 and that is unpersonalized. Here's how I made my own, personalized one, for around $7 bucks.

What you'll need:
2 beach towels, scissors, and a sewing machine. (embroidery is optional) Terry cloth is very thick so make sure you have good scissors. I hit up Target while they were having beach towels on sale for $3 each. Check out end of the season sales to get great deals on towels, and then you can have them ready for gifts around Christmas in peak Resort season time!


Step 1: If you want any kind of applique or embroidery on the front towel, do that first. (This is the towel that you aren't cutting up)
Monogram before you sew


Cut trying to save hemmed edges, and you'll save time
Step 2: Using your spare towel, measure and cut around 13" (keeping width the same...most towels are 30"). This will be the part that holds the towel onto the chair. I tried to use the hemmed sides as much as possible...because it's just less sewing you have to do.


Step 3: Do any embroidering you'd like on the extra fabric (back of chair). Pin this piece to the top of the main towel (right sides together), and sew. If you kept the hemmed side on your spare towel you're done. If you need to hem, do that before you sew it to the main towel. Turn right side out and you're done with the top part.
Pin right sides together to sew pocket at top that holds the towel to the chair


My pockets were 9" in length
Step 4: Measure how big you'd like your pockets. I used the design on the the towel to dictate how big they were. Think about what you'll use them for: sunblock, keys, magazines, etc. Measure out to identical pieces, keeping the width (30"). Mine were about 10". You'll want to measure how much your chair sits off the ground. Mine was about 10" from the floor to the chair, so I made my pockets 9" in length. So I folder my pockets up, right sides together, 9" and sewed around edges. Flip right side out. Voila! A pocket!


Step 5: Hem up the sides of the towel that are now hanging strangely because you made the pocket. Fold the top of the pocket down, back to back and sew all the way around. I left 2 inches between the top of the pocket this top part.
Hem sides of the top part of the pocket


Step 6: Fold top of pocket down and sew down. I used presser foot width. Now your pocket has a flap! There are many ways to make a pocket for this chair. I did it this way to minimize cutting and hemming.


Step 7: Make the other pocket using Steps 4 through 6.

Step 8: Sew the pockets onto the main towel. I measured the width of the chair, length of chair to floor, but my pockets were longer than 9" based on my little design there so when I sewed them on, they touched the floor the little. :-( You also need to make sure that they are measured lengthwise on the chair. I put my pockets between 28" and 48" from the top of the chair. My advice, don't even bother with measuring. Just go pin them on while your towel is on the chair. Then they'll be perfect.  Use the line you sewed in Step 6 as a guideline to sew the pocket on the towel.
Sew the pockets to the main towel


Fabric I had left after my pockets
Step 9 (optional): You'll have about 1/3 of your spare towel left at this point. It's fine to stop here, but if you'd like to extend your towel, so your feet can rest on a towel, use your extra fabric to extend it on out. I put my almost finished towel on my chair, and measured how much more fabric I needed to cover the chair. Cut your spare towel based on those measurements, pin right sides together at bottom of main towel, and sew. I took my hemmed edge from the main towel and layed it over the unhemmed edge of the extra towel, and sewed it down, so the towel will lay flay when on the chair. You're done!
Back of extra piece, sew so it'll lay flat
Front of extra piece


It's still completely washable, and it folds up easily into the back pocket (that folds over the chair).